
Nook Touch Rooting Guide
Overview
Below are some super-easy directions for rooting the Nook Touch to install Android apps, with Android Market access. The first video shows the rooted Nook Touch in action running various Android apps, including several ereading apps like Aldiko, Kindle, and Kobo, as well as the Opera web browser, which works much better than the stock browser. Below that there's a second video showing exactly how to root the Nook Touch using a Windows computer, along with written directions.
Update: Follow these different set of directions for rooting the Nook Touch with GlowLight using GlowNooter.
Update #2: Unfortunately this method of rooting no longer works with the newer 1.2.x firmware. Thanks a lot, B&N.
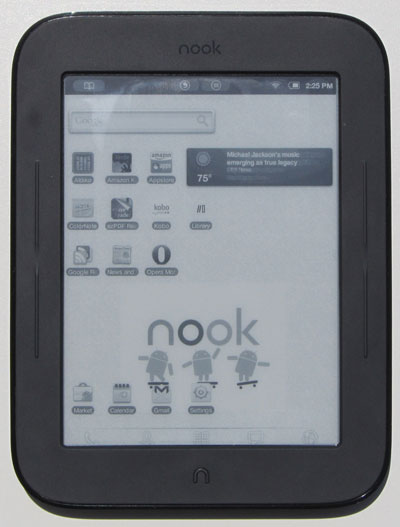
Rooted Nook Touch Review - eReading Apps & More
The entire rooting process took me less than 10 minutes to go from stock Nook Touch to rooted Nook Touch. It is very easy and doesn't require any complicated steps. All I did was follow the directions on this thread at the XDA forums. They may be hard to follow if you are a beginner so here is a video tutorial and some easy-to-follow written directions:
Video Tutorial: Nook Touch Rooting Directions
- Rooting the Nook Touch comes with some risks. I am not responsible if you break your Nook.
- These directions are for the original Nook Touch only. Follow these alternate directions for rooting the GlowLight Nook Touch using GlowNooter.
- These directions were written for an older version of TouchNooter but the process is still the same. You can also use these alternate directions for rooting the Nook Touch but it's more outdated.
- The Nook's regular features will still work after rooting.
- Visit the XDA thread for questions and troubleshooting; I'm not an expert so I cannot help in that department. All the credit for this easy rooting process goes to the smart folks at XDA, especially Gabrial Destruir for putting TouchNooter together.
Nook Touch Rooting Directions - Super Easy Method
- It is highly recommended that you create a backup of your Nook Touch before rooting so that you can revert back to its exact current state at anytime to un-root or fix it if something goes wrong.
- Shut down your Nook Touch completely. Hold down the power button to prompt power off.
- Download TouchNooter from here: touchnooter-2-1-31.zip.
- Unzip TouchNooter with a program such as WinRAR; you'll find a TouchNooter image file inside.
- Write the TouchNooter image to a microSD card; you'll need an external microSD card reader if your computer doesn't have one built in (don't use your Nook!). For Windows, use WinImage or Win32DiskImager to write the image to a card. For WinImage, open as Administrator, then go to Disk, then "Restore Virtual Hard Disk on Physical Drive". Hit okay and then choose the TouchNooter image (I had to select show all files to get it to appear since it uses .vhd by default).
- Insert the microSD card into Nook Touch and power on. Follow the directions on the TouchNooter boot screen. Once the Nook Touch is booted up, unlock the screen and touch the Android guy to begin, then hit skip twice to skip sign in. Enable location services when given the option (it should already be checked by default).
- Select to use ADW Launcher to access the new open Android portion of your Nook Touch and then make sure WiFi is connected before proceeding (mine was already working from being setup prior to root).
- Launch the YouTube app (tap the icon on the bottom center of the screen that looks like four squares to launch the app drawer, then scroll to the right to find YouTube). With YouTube open, hit menu (small button on the top center of the screen) then select "My Channel". Sign in with a Gmail account. If you used a Gmail account for your B&N account, you should use that one. Hit allow a couple of times then once you're finished exit YouTube.
- Launch Gmail. Tap menu, then refresh. After it syncs, exit.
- Launch the app drawer again, then open the app called Nook Color Tools. Un-check, then re-check allow non-market apps. Exit.
- At this point you are good to go, but it is a good idea to shut down the Nook Touch once more to let it do a full restart, and make sure to remove the microSD card if you haven't already (I use a free program called SDFormatter to format it and restores the card back to its original size). After the card is restored, put it back in the Nook and turn the device back on. The Nook may ask to format the card. Do so. Now everything is done and you are ready to install some apps. However, it may take 24 hours before the Android Market will work.
Update: Check out this second Rooted Nook Touch Tutorial to learn how to fix the broken search feature for the Android Market if it's giving you troubles, how to install and uninstall apps, change the appearance and placement of Button Savior, and other helpful tips and tricks for getting started with the rooted Nook Touch. And here's another post worth mentioning: Nook Touch Working Apps List.
